
사내 취약성 기준이 httpd 버전을 2.4.58 이상으로 반드시 쓰라는 얘기가 나와서,
기존에 설치되어 있던 RedHat JBCS httpd 에서 Apache httpd 로 이전해보고자 한다.
RedHat JBCS httpd도 분명 꾸준히 업데이트가 되고 있지만,
단순 버전 차이에서 오는 문제라든지, OpenSSL의 종속성 문제라든지, 대부분의 구글링 문서들이 Apache httpd 문서 기준이라든지(RedHat JBCS httpd와 Apache httpd의 디렉토리 구조가 다르다.), 앞으로도 계속 이런 자잘자잘한 문제들이 나를 괴롭힐 수 있을 것 같다는 생각에,
Apache httpd 를 컴파일 설치하여, RedHat JBCS httpd를 걷어내보고자(?) 한다!
참고로, 필자의 경우, RHEL 7,8,9 에서 OpenSSL 1.0.2k, 1.1.1k, 3.2.1 버전 모두 Apache httpd 컴파일 설치를 진행해본 결과, 몇몇 에러들만 잡으면, 구동 및 운영에는 문제가 없는 것으로 보였다.
따라서, RHEL 7 이상, OpenSSL은 3.2.1. 버전 이상 기준으로 설명한다.
아래 명령어는 모두 root와 동등한 권한으로 수행하고, 추후에 'apache' 계정으로 권한 및 소유권을 조정할 것이다.
1. openssl 1.1.1 컴파일 설치
1.1. openssl 컴파일 설치 진행되는 디렉토리 생성
mkdir /opt/openssl_compile
cd /opt/openssl_compile
1.2. openssl 공식 홈페이지에서 tar.gz 파일 받기
이 글 작성일 기준(2024.04.05.)으로 openssl3 버전의 latest stable version은 ‘3.2.1’ 이다.
openssl 다운로드는 아래 사이트를 참조한다.
https://www.openssl.org/source/
[ Downloads ] - /source/index.html
Downloads The master sources are maintained in our git repository, which is accessible over the network and cloned on GitHub, at https://github.com/openssl/openssl. Bugs and pull patches (issues and pull requests) should be filed on the GitHub repo. Please
www.openssl.org
wget https://www.openssl.org/source/openssl-3.2.1.tar.gz
tar xvf openssl-3.2.1.tar.gz
1.3. 소스 컴파일 전, Makefile(환경설정 파일) 생성
cd openssl-3.2.1

# 서버에 기존 사용하는 openssl이 있을 수 있으니,
# 컴파일 설치하는 openssl3는 다음과 같이 설정하여, 기존 설치된 openssl과 구분하도록 하자!
./config --prefix=/usr/local/openssl3 --openssldir=/usr/local/openssl3 shared
--prefix : 설치할 위치 지정
--openssldir : openssl 실행 시, 참조할 기본 디렉토리 지정
아래와 같은 문구가 나타났다면, openssl config가 정상적으로 수행된 것이다.
💡Cant' locate IPC/Cmd.pm in @INC (you may need to install the IPC::Cmd module) 에러
IPC-Cmd 가 없는 문제이므로, yum으로 해당 패키지를 설치한다.
yum install perl-IPC-Cmd perl-Pod-Html

# 기존 configure 및 캐시 삭제
make distclean

# make 파일 재설정
./config --prefix=/usr/local/openssl3 --openssldir=/usr/local/openssl3 shared
💡No C compiler found, please specify one with the environment variable CC 에러
C 및 C++ 에 대한 컴파일러가 없어서 나타나는 문제이므로, 아래와 같이 컴파일 설치에 필요한 패키지를 설치한다.
yum install gcc gcc-c++

# 기존 configure 및 캐시 삭제
make distclean

# make 파일 재설정
./config --prefix=/usr/local/openssl3 --openssldir=/usr/local/openssl3 shared
1.4. Makefile 을 이용한 파일 컴파일 설치
make && make install모두 컴파일 하는 데에 시간이 꽤나 걸린다. 차분히 기다리자!
아래와 같은 ‘Leaving directory’ 문구가 나타나면, 컴파일이 끝난 것이다!
1.5. 공유 라이브러리 등록
openssl 설치 시, 동적 라이브러리를 이용하도록 설정(shared 옵션)했기 때문에, 동적 라이브러리 로딩 정보에 새로 설치한 openssl과 관련된 라이브러리 디렉토리를 추가해야 한다.
1.5.1. Linux 공유 라이브러리 conf 파일 설정
vim /etc/ld.so.conf.d/openssl3.conf
# 여기서 파일명을 'openssl3.conf'로 지정했지만, 임의로 지정 가능

# openssl3.conf 에 아래 문구 넣기
/usr/local/openssl3/lib64
1.5.2. 공유 라이브러리 캐시를 재설정 및 확인
ldconfig -v | grep -E "libssl.so|libcrypto.so"ldconfig -v 명령어를 사용하면, 현재 모든 shared library cache 목록이 나타나게 되는데, 이러면 openssl3와 관련된 shared library는 확인이 어려우므로, grep -E "libssl.so|libcrypto.so" 명령어를 사용하였다.
1.6. /usr/lib64 디렉토리에도 라이브러리의 링크 추가
아래 명령어를 통해, 동적 라이브러리를 처음 찾는 디렉토리인 /usr/lib64에도 해당 라이브러리가 존재하는 지 확인해보자.
ls -al /usr/lib64 | grep -E "libssl|libcrypto"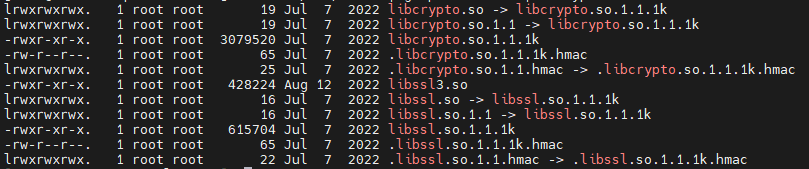
그러면 필자의 경우, 위와 같이 openssl3 설치와 함께 생긴 library는 아직 /usr/lib64에는 없는 것으로 보인다.
이럴 경우, 아래 과정을 거쳐 심볼릭 링크로 등록해주어야 한다.
1.6.1. /usr/lib64 디렉토리에 새로 설치한 openssl3 의 동적 라이브러리 심볼릭 링크 추가
ln -s /usr/local/openssl3/lib64/libssl.so /usr/lib64/libssl.so.3
ln -s /usr/local/openssl3/lib64/libcrypto.so /usr/lib64/libcrypto.so.3

# 위 명령어 수행 후, 동적 라이브러리 디렉토리 다시 확인
ls -al /usr/lib64 | grep -E "libssl|libcrypto"
2. 기존 'openssl' 명령어가 실행되는 경로를 새로 설치한 openssl3 경로로 변경
2.1. 현재 시스템의 'openssl' 명령어 실행 경로 확인
which oepnssl
openssl version
기존 openssl은 openssl 1.1.1k 버전으로 설정되어 있으므로, 이 경로를 openssl3 로 변경해 줄 것이다.
2.2. 기존 명령어의 이름을 변경
mv /usr/bin/openssl /usr/bin/openssl_1.1.1k
2.3. 새로 설치한 openssl3 버전의 명령어를 '/usr/bin/openssl' 로 만들기
cp /usr/local/openssl3/bin/openssl /usr/bin/openssl
2.4. 'openssl' 명령어가 openssl3로 제대로 업데이트 되었는 지 확인
openssl version
위와 같은 명령어 수행 결과가 나온다면, 새로 설치한 OpenSSL3의 동적 라이브러리를 불러와서 잘 동작하는 것이다.
3. Apache httpd 2.4.59 수동 설치
3.1. httpd 수동(컴파일) 설치 위한 사전 준비
# Apache httpd 컴파일 설치 시 필요한 유틸리티 설치
yum install gcc-c++ expat-devel

# Apache httpd 컴파일 설치에 필요한 라이브러리들을 설치할 디렉토리 생성
mkdir /opt/apache_compile
cd /opt/apache_compile
3.2. apr, apr-util, pcre 라이브러리 설치
httpd 를 수동으로 빌드하기 위해서는 apr, apr-util, pcre 라이브러리가 필수적으로 필요한데, httpd 설치파일에 포함되어 있지 않다.
따라서, 해당 라이브러리들의 설치가 필요하다.
아래 경로를 참고해서 apr과 apr-util 을 설치하자.
https://apr.apache.org/download.cgi
Download - The Apache Portable Runtime Project
The currently selected mirror is https://dlcdn.apache.org/. If you encounter a problem with this mirror, please select another mirror. If all mirrors are failing, there are backup mirrors (at the end of the mirrors list) that should be available. You may a
apr.apache.org
3.2.1. apr 라이브러리 설치
아래 명령어로 apache_compile 디렉토리를 새로 생성하여, 해당 디렉토리에 apr을 설치하자!
# apr 라이브러리 tarball 다운로드
wget https://dlcdn.apache.org//apr/apr-1.7.4.tar.gz
tar xvf ./apr-1.7.4.tar.gz

# apr 라이브러리 설치 디렉토리로 이동
cd ./apr-1.7.4

# apr 설치 위한 make 파일 설정
./configure --prefix=/usr/local/apr
💡rm: cannot remove 'libtoolT' : No such file or directory 에러
-> 현 디렉토리(/opt/apache_compile/apr-1.7.4.tar.gz) 에서 아래 명령어 수행한다.
# 에러 해결 위함
cp -arp libtool libtoolT

# 기존 configure 설정 및 캐시 제거
make distclean

# apr 설치 위한 make 파일 재설정
./configure --prefix=/usr/local/apr
아래 명령어 통해 컴파일 설치
make && make install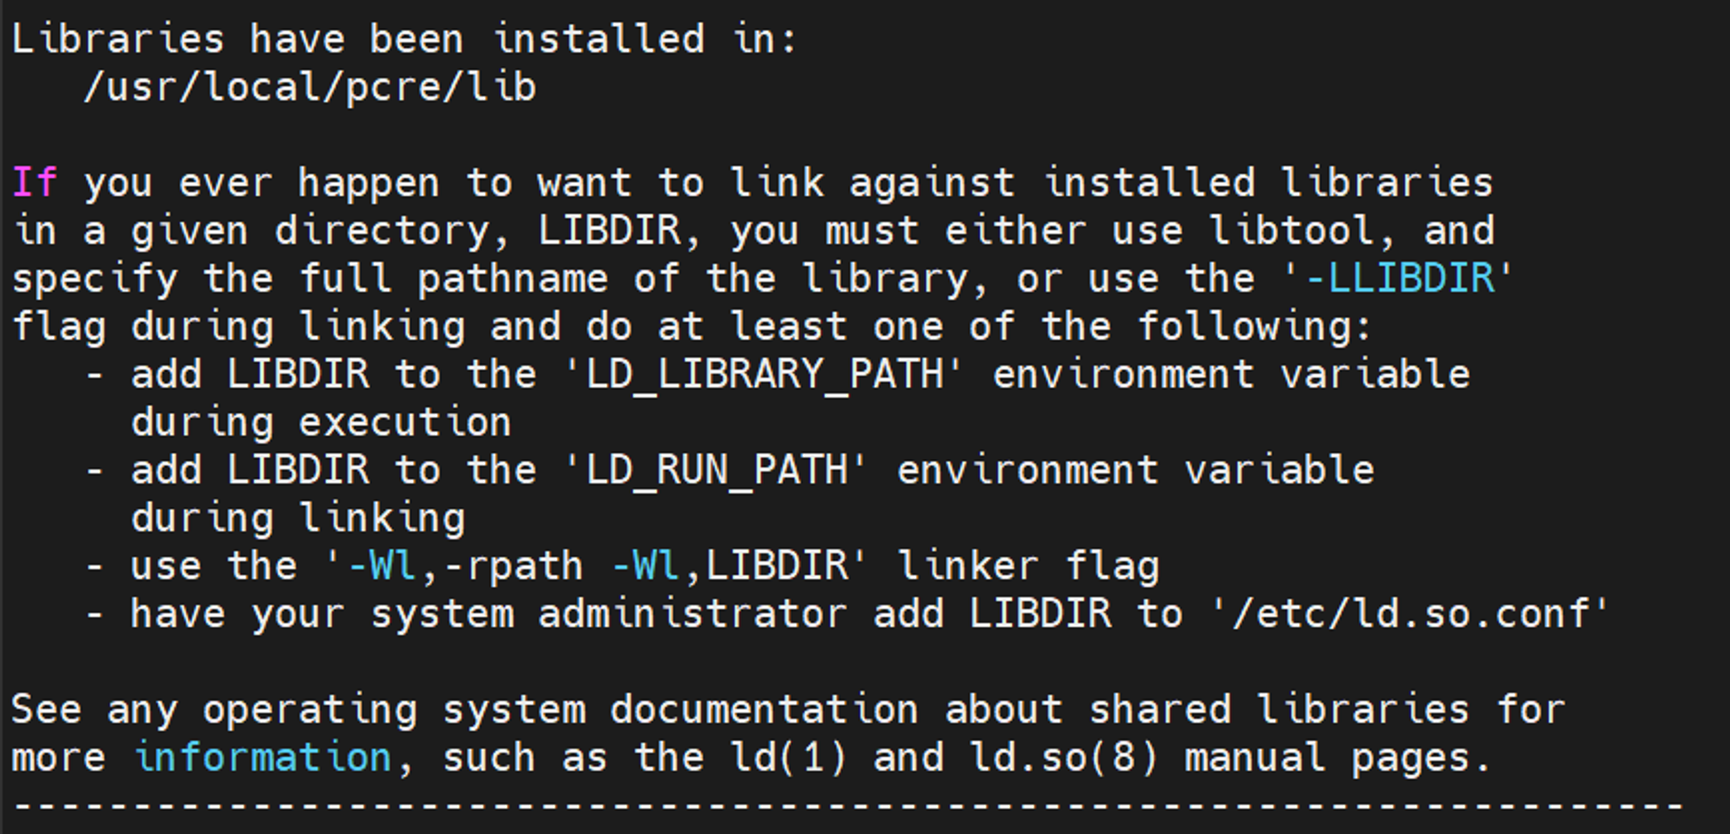
3.2.2. apr-util 라이브러리 설치
cd /opt/apache_compile

# apr-util 라이브러리 tarball 다운로드
wget https://dlcdn.apache.org//apr/apr-util-1.6.3.tar.gz
tar xvf ./apr-util-1.6.3.tar.gz

# 압축 푼 apr-util 라이브러리 설치 디렉토리로 이동
cd ./apr-util-1.6.3

# make 파일 설정
./configure --prefix=/usr/local/apr-util --with-apr=/usr/local/apr

# 컴파일 및 설치
make && make install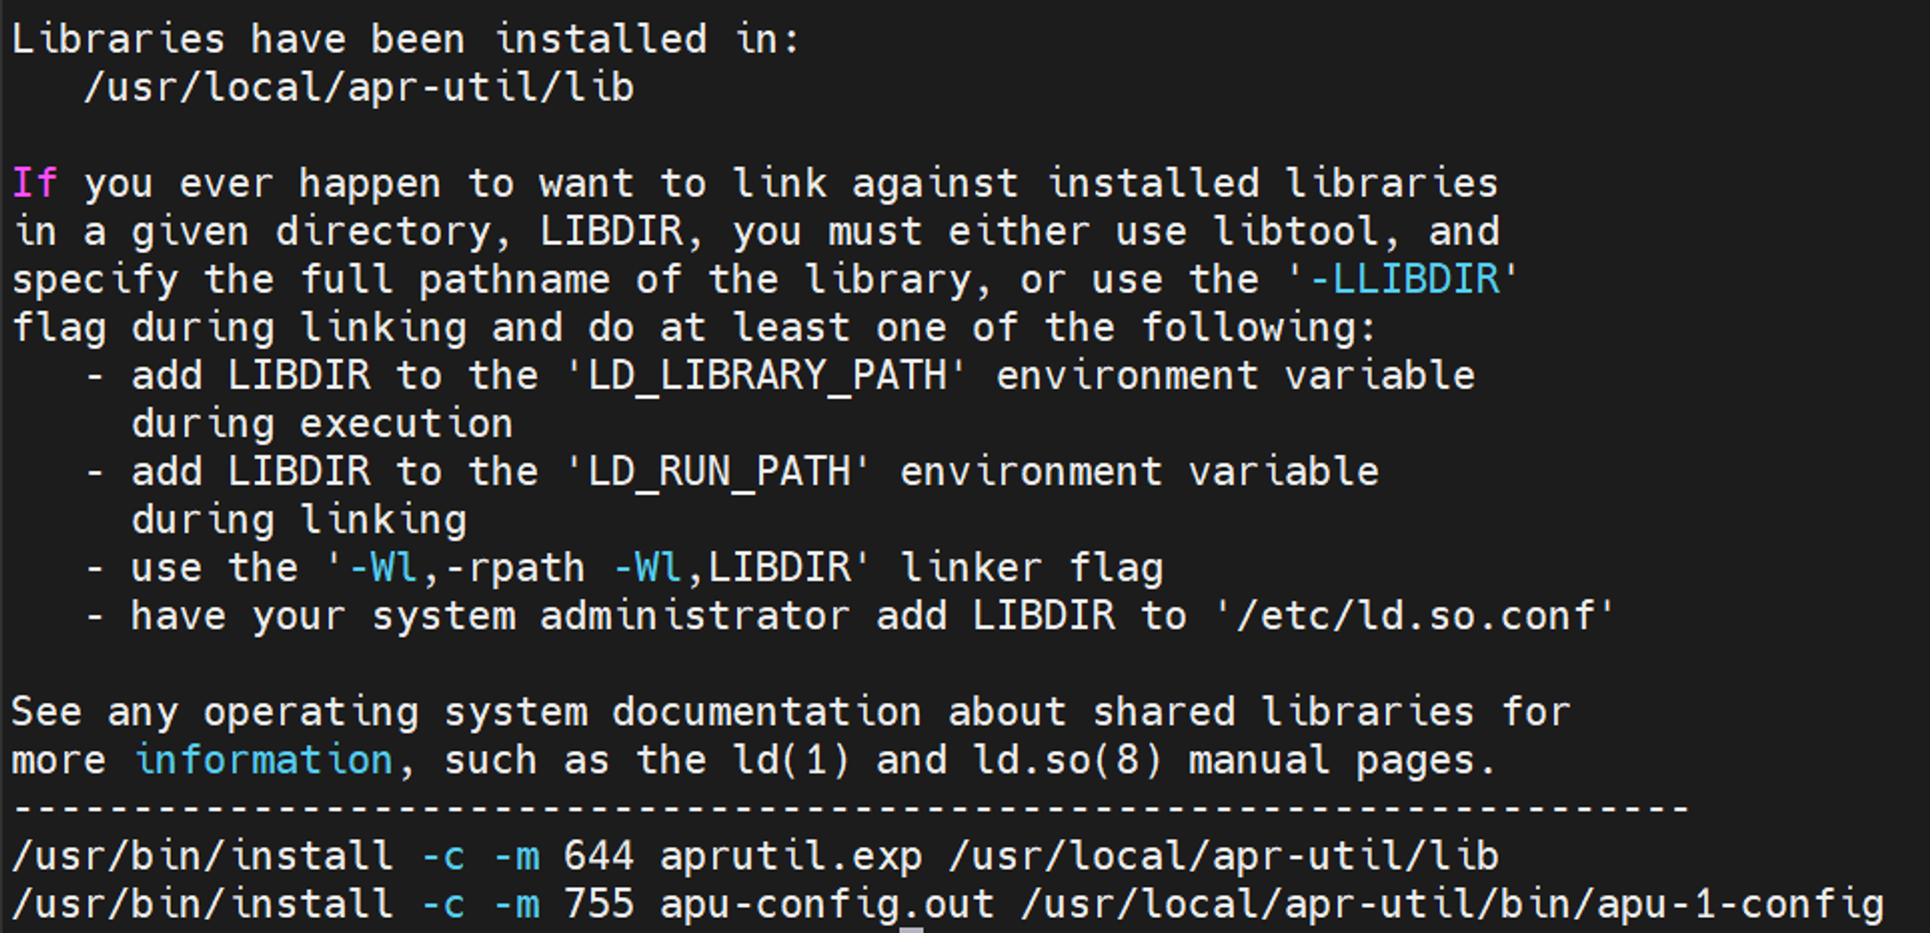
3.2.3. pcre 라이브러리 설치
PCRE - Perl Compatible Regular Expressions
PCRE - Perl Compatible Regular Expressions The PCRE library is a set of functions that implement regular expression pattern matching using the same syntax and semantics as Perl 5. PCRE has its own native API, as well as a set of wrapper functions that cor
www.pcre.org
위 링크를 통해 pcre 라이브러리 tarball 다운로드 링크를 참고하자.
cd /opt/apache_compile

# pcre 라이브러리 tarball 다운로드
wget https://github.com/PCRE2Project/pcre2/releases/download/pcre2-10.43/pcre2-10.43.tar.gz
tar xvf ./pcre2-10.43.tar.gz

# 압축 푼 pcre 라이브러리 설치 디렉토리로 이동
cd ./pcre2-10.43

# make 파일 설정
./configure --prefix=/usr/local/pcre2

# 컴파일 및 설치
make && make install
3.3. httpd 2.4.59 설치 (2024.04.05 기준 latest version)
mpm module을 선택하기 위해, 기존에 사용하고 있던 RedHat JBCS httpd가 어떤 mpm module을 사용하고 있었는지,
다음 명령어를 통해 조회 가능하다.
cd ${RedHat JBCS HTTPD DIR}/bin
./httpd -V
이후 아래 링크를 참고하여 Apache httpd 소스 tarball을 다운로드하자!
https://httpd.apache.org/download.cgi#apache24
Download - The Apache HTTP Server Project
Downloading the Apache HTTP Server Use the links below to download the Apache HTTP Server from our download servers. You must verify the integrity of the downloaded files using signatures downloaded from our main distribution directory. The signatures can
httpd.apache.org
cd /opt/apache_compile

# Apache httpd 소스 tarball 다운로드
wget https://dlcdn.apache.org/httpd/httpd-2.4.59.tar.gz
tar xvf ./httpd-2.4.59.tar.gz

cd ./httpd-2.4.59

# httpd의 설치 경로를 /opt/httpd 로 한다고 가정하고, make 파일 설정 위한 다음 명령어 수행
# httpd가 사용하는 openssl의 경로는 /usr/local/openssl3
# --with-mpm : 2.4.x 버전 기준, default로 'Event' MPM Module로 설정되며, 다음과 같이 플래그를 주면, 해당 MPM Module을 사용하게끔 설치된다.
# MPM Module의 경우, Thread-Safety한 상황이라면, 'Event' MPM Module이 성능이 가장 좋다.
./configure --prefix=/opt/httpd \
--with-ssl=/usr/local/openssl3 \
--enable-mods-shared=all \
--enable-modules=all \
--with-apr=/usr/local/apr/bin/apr-1-config \
--with-apr-util=/usr/local/apr-util/bin/apu-1-config \
--with-pcre=/usr/local/pcre2/bin/pcre2-config \
--with-mpm=prefork

# 컴파일 및 설치
make && make install
다음 명령어를 통해 Apache httpd가 제대로 설치되었는 지 확인해보자!
cd /opt/httpd/bin

# httpd 버전 확인
./httpd -v
3.4. Apache 기본적인 설정 및 구동 테스트
이제 Apache httpd 설치가 모두 완료되었으니, 다음 명령어를 입력하여, httpd가 제대로 실행되는 지를 확인해보자!
cd /opt/httpd/bin

# httpd 실행
./apachectl -k start

# httpd 프로세스 확인
ps -ef | grep httpd
위와 같이 httpd 프로세스가 떠 있는 것을 확인했다면, httpd://{httpd 가동한 서버 IP}:80/ 을 주소창에 입력하면 아래와 같은 문구가 나타날 것이다. 그럼 httpd가 정말 제대로 실행된 것이다!

이제 그럼 아래 포스팅을 통해, RedHat JBCS httpd 에서 Apache httpd로 변경할 때,
세부 configuration들을 어떻게 이전시키고 설정해야 할지에 대해 알아보자!
참고
[CentOS 7] Apache 2.4.48 웹서버 수동 설치 및 TLS 1.3 적용하기
[CentOS 7] Apache 2.4.48 웹서버 수동 설치 및 TLS 1.3 적용하기
TLS 1.3 을 지원하려면? openssl 1.1.1 수동설치 openssl 1.1.1 설치 공유 라이브러리 등록 openssl 관련 라이브러리 확인 및 추가 openssl 관련 라이브러리 확인 및 등록 httpd 2.4.51 수동설치 필수 패키지 사전
blog.jiniworld.me
Apache HTTPD versions supported by Red Hat - Red Hat Customer Portal
Apache HTTPD versions supported by Red Hat - Red Hat Customer Portal
What version of httpd is supported on RHEL? Is the community version of Apache httpd supported? Which versions of Apache httpd are supported? How can I install Apache 2.5/2.6? Is Apache httpd 2.5/2.6 supported? Does Redhat support self compiled apache inst
access.redhat.com
'Middleware > 웹서버' 카테고리의 다른 글
| [httpd] https://{IP} 로 URL을 입력받았을 때, https://{domain name}으로 리다이렉션 시키는 방법 (3) | 2024.04.11 |
|---|---|
| [httpd] Apache httpd의 로그 삭제 스크립트 및 crontab 등록하여 로그 파일 삭제 자동화하기 (0) | 2023.11.22 |
| [Nginx] http → https 리다이렉션 및 SSL 인증서 적용 (Nginx ver.1.20.1 기준) (1) | 2023.11.03 |
| [IIS] IIS(웹서버) 구축_Windows Server 2019 환경 (0) | 2022.07.22 |
| [httpd] Apache httpd Rewrite 모듈 설정 - 페이지 리다이렉션 하기 (0) | 2022.06.10 |


최근댓글